
Blog
Restoring a Burned Perfect-Handle Screwdriver
How I preserved a fire-damaged family screwdriver with careful rust removal, nickel plating, walnut scales, and an important epoxy lesson.
The quick answer
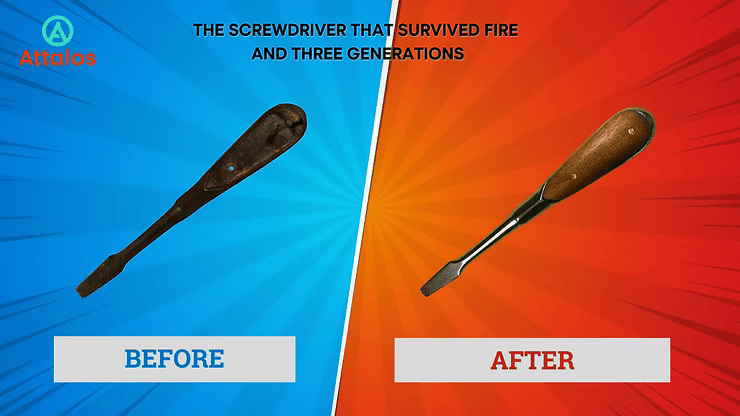
I restored my grandfather's fire-damaged perfect-handle screwdriver by removing rust with electrolysis, preparing the steel by hand, applying a calculated nickel deposit, and making new walnut scales fixed with brass pins. The metal still carries its history, but the tool is structurally whole again. I will preserve it as a family heirloom rather than return it to daily use.
Why this screwdriver mattered
Some tools are more than steel and wood. This screwdriver belonged to my grandfather, who died in the late 1980s. His phone number was the first one I memorized when I was five. The tool later passed to my father and eventually to me.
During a family barbecue in the early 2000s, it was used to stir the coals and accidentally left behind. The wooden scales burned away, leaving a blackened metal shaft. I still remember my father's sadness when he found it.
For years it remained in a toolbox: not exactly forgotten, but too personal to approach casually. Once I began restoring old tools, it moved to the top of my list. I waited until I was prepared to work slowly and accept that preserving its story mattered more than making it look factory-new.
What is a perfect-handle screwdriver?
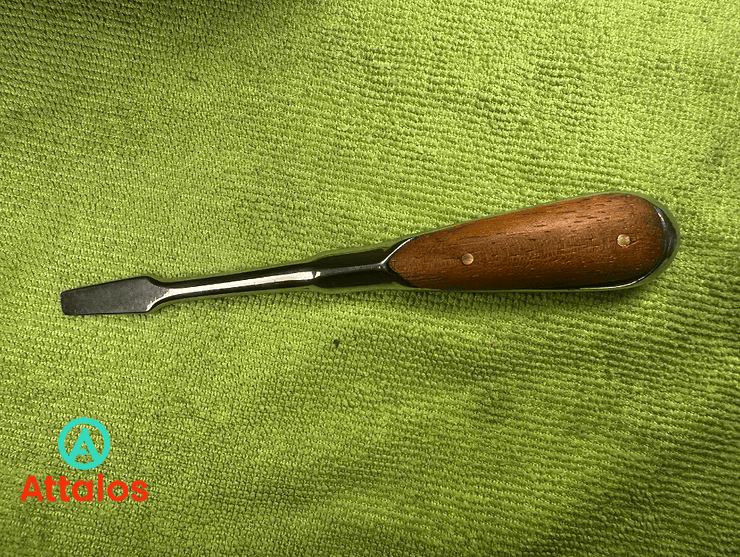
A perfect-handle screwdriver uses a forged metal body with separate handle scales attached on either side. On this example, pins pass through the scales and steel to hold the assembly together. That construction made restoration possible after the original wood had burned away: the steel body survived, and replacement scales could be shaped around it.
Restoration plan and key workshop facts
The work was spread across several days so I could inspect the result between stages.
- Rust removal: low-current electrolysis
- Metal preparation: wire brushing, filing, deburring, and sanding from 120 to 2000 grit
- Plating bath used: 2 litres from a 5-litre homemade nickel solution
- Bath temperature: approximately 40°C
- Estimated steel surface area: approximately 60 cm²
- Plating current and time: 1.2 A for 1 hour 3 minutes
- Target nickel deposit: 25 microns, calculated with Faraday's law
- New handle material: walnut
- Pins: brass
- Final wood finish: boiled linseed oil
These numbers document this particular object and setup. They are not universal settings for another part or plating system.
Step 1: Removing rust without erasing the surface
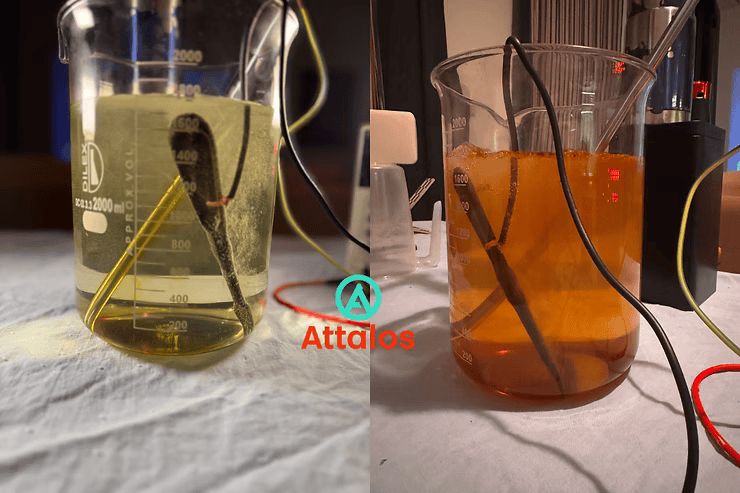
The shaft had light rust over the fire-darkened surface. I chose electrolysis as the first cleaning stage because it could loosen corrosion without immediately grinding away sound metal.
My setup used the screwdriver as the cathode, a sacrificial steel anode, water with electrolyte, and a low DC current for several hours. Once the loose corrosion lifted, I rinsed and dried the part before continuing.
A necessary safety boundary
This is a record of my restoration, not a complete electrolysis or electroplating tutorial. Electrical current through salt water can produce hazardous chlorine compounds and hydrogen, while nickel solutions can harm the skin and respiratory system. Anyone considering similar work should first use a process-specific safety guide, suitable ventilation and personal protective equipment, a verified electrolyte, and locally compliant chemical disposal. Never treat a copied workshop recipe as a substitute for a risk assessment.
Step 2: Preparing the steel
An old nail remained embedded in the shaft. I filed down its head, pulled it out with pliers, and deburred both pin holes by hand. A wire brush and grinding tool removed the remaining loose debris.
I then dry-sanded from 120 to 600 grit and wet-sanded with WD-40 from 800 to 2000 grit. Because I often leave several days between sessions, the light oil film helped limit flash rust and kept the abrasive from clogging.
The goal was not to erase every mark. It was to create a clean, consistent surface while retaining enough evidence of the screwdriver's life.
Step 3: Cleaning and nickel plating
Every item that would touch the bath—the screwdriver, nickel anode, clips, and wires—was cleaned with isopropyl alcohol. I wore gloves to avoid transferring skin oils back to the prepared steel.
The bath came from a 5-litre homemade nickel solution prepared in June 2025; I used 2 litres for this run. A heated magnetic stirrer kept the electrolyte near 40°C. The anode was a new 8 mm × 100 mm nickel bar, also cleaned before use.
Calculating and evening the deposit
For the screwdriver's estimated 60 cm² surface area, I used Faraday's law to target a 25-micron nickel layer. The run lasted 1 hour 3 minutes at 1.2 A.
For future plating jobs, PlateLab can calculate current or time from the metal, surface area, target thickness, and efficiency, then save the result with process notes.
Geometry still matters even when the electrical calculation is sound. To reduce shadowing, I rotated the part manually every 15 minutes. That simple intervention helped the nickel reach the different faces more evenly.
Step 4: What the magnetic stirrer contributed
The stir bar kept the bath moving at roughly 300 RPM. It also nudged the suspended part gently, reducing stagnant areas, and collected some magnetic debris.
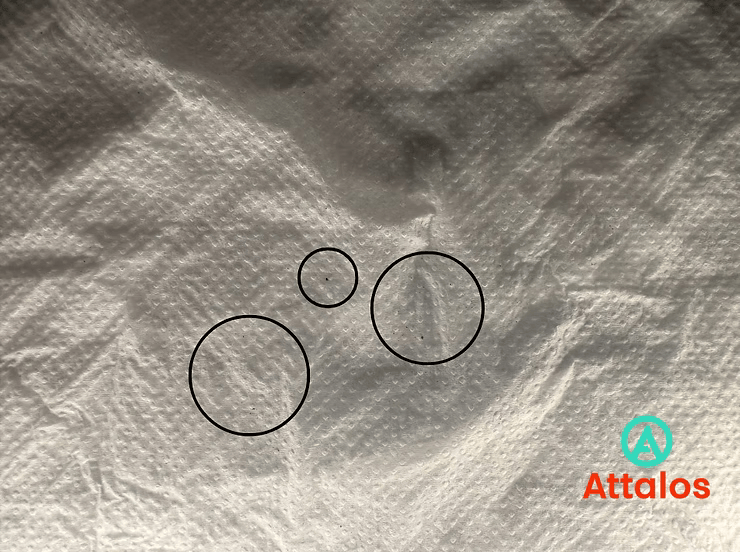
I could not find my usual coffee filters late that evening, so I carefully checked two pieces of white paper towel for tears and used them as a temporary filter. The residue was lighter than expected. The fresh electrolyte, unused anode, and debris attracted to the stir bar all likely contributed to that result.
Step 5: Making the walnut scales
I chose walnut for its durability and warm colour. After bringing the blanks close to size with a vertical drill, I shaped them with a rasp. Painter's tape gave me a visible reference for the final outline, and I finished the fit with files and hand sanding.
This stage required repeated fitting. The two scales needed to feel like one handle while meeting the steel body cleanly and leaving the pin holes aligned.
Step 6: Drilling, bonding, and the mistake I would not repeat
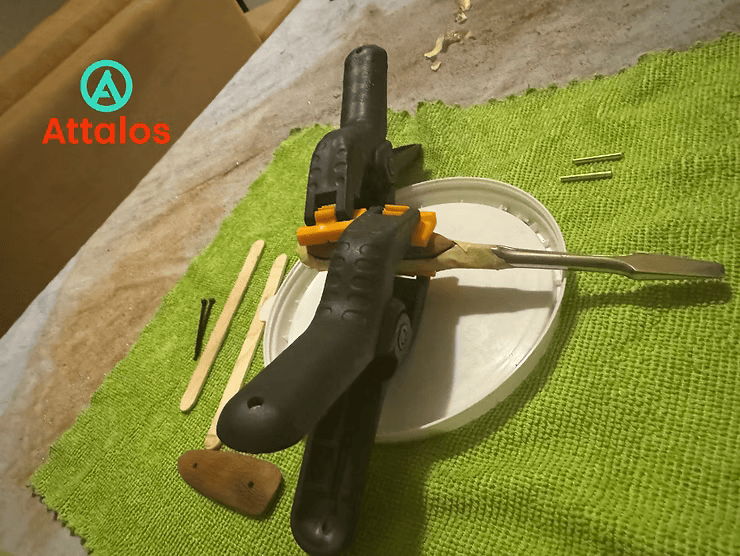
I drilled the scales and steel for 2.5 mm brass pins using a FAMAG wood bit. Without a drill press, the bit still entered cleanly and did not wander in the walnut.
After cleaning the plated faces with acetone, I masked the visible nickel to keep epoxy away from the finish. I used Fischer Power transparent two-component epoxy. Its label specified 15 minutes to harden and 24 hours for a full cure.
I waited only 45 minutes before inserting the brass pins. In the Cyprus summer heat—and with my own impatience—that felt sufficient. It was not. One scale later separated slightly at the edge.
The clearest lesson from the restoration
“Hard enough to handle” is not the same as fully cured. On a pinned wooden scale, pressing ahead early can disturb the bond before the adhesive has developed its intended strength. If I repeated this stage, I would follow the full cure time before pinning or further shaping.
Step 7: Pins, oil, and final polish
I filed the brass pins flush, applied boiled linseed oil to the walnut, and gave the complete screwdriver a final hand polish.
At one point I swept the metal dust, wood shavings, and cat fur into what I now call the “everything jar.” I still have no plan for it, but it belongs to the story of the restoration.
What would I change next time?
Three decisions are worth carrying into another restoration:
- Treat chemical and electrical safety as a separate design problem before setting up the process.
- Rotate an irregular part during plating instead of assuming one orientation will coat every face evenly.
- Respect the adhesive's full cure time, especially before inserting pins or loading the joint.
The slight separation in one scale remains part of this object's honest record. Restoring an heirloom does not require pretending that either its history or the repair was flawless.
The finished heirloom
This was never only about repairing a screwdriver. It allowed three generations to meet again through the same object and through work done by hand.
I filmed the complete restoration in an ASMR-style video: no narration, only the sounds of cleaning, sanding, shaping, and plating.
The screwdriver will not return to service. It will stay with me as a preserved family object, with the fire marks, new walnut, and lessons of the restoration held together in one piece.
Disclosure: I am not associated with or sponsored by any brand mentioned here. I bought every product used in the restoration, and the observations above reflect only this project.
Thank you, Grandpa, for the memories—and thank you, Dad, for passing this screwdriver to me.
If you have an heirloom object whose story deserves a careful restoration or display solution, tell Attalos about the object and the outcome you want.