
Blog
Restoring a 50-Year-Old Brass Bath Bowl
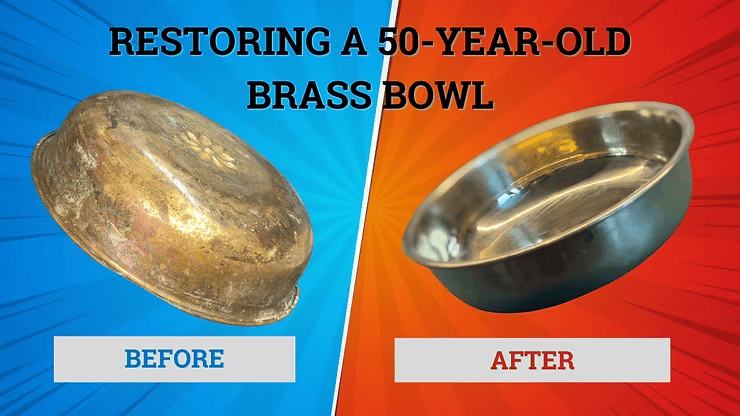
How I cleaned, polished, and repaired a cracked 50-year-old brass bath bowl while preserving its family history and visible age.
The quick answer
I restored my mother's 50-year-old brass bath bowl by documenting its condition, cleaning the tarnished surface with a short application of citric-acid paste, polishing it gradually, stabilizing two cracks with solder, and completing a gentler final polish. The goal was not a factory-new mirror finish. It was to recover the brass's warmth while preserving enough wear to keep the object recognizably hers.
Because the alloy, earlier surface treatments, flux, and solder composition were not formally identified, the restored bowl is best treated as a display heirloom—not as a food, drinking, bathing, or plant container.
Why this brass bowl mattered
The bowl was given to my mother when she married, around 50 years ago. It was never used for its original purpose. For decades it stayed in drawers, and in more recent years it served as an indoor flower pot, collecting soil, dust, moisture, and the quiet evidence of family life.
When I brought it home to restore, I was not looking at anonymous scrap brass. I was handling a small object that had been present through most of my mother's adult life. That changed the brief: improve its condition, make the cracks stable enough for display, and retain the signs that distinguish an heirloom from a reproduction.
What is a brass bath bowl?
A traditional bath bowl, or hamam tası, is a shallow metal vessel used to scoop and pour water during bathing. This example is made from thin formed brass and has an embossed flower pattern in its centre.
Brass is a copper-and-zinc alloy. Its warm colour can become dull or dark as the surface reacts with its environment. That change is not automatically damage. Stable tarnish may be part of an object's history and can offer some protection, while active corrosion, cracks, residues, and trapped moisture require a different assessment.
Condition before restoration
Before choosing a process, I inspected the bowl under good light.
- Two cracks ran from the side areas and needed structural attention.
- Both faces were dull and oxidized.
- Soil and residues had accumulated from its years as a flower pot.
- Fine scratches recorded decades of handling.
- The central embossed flower still retained its form.
- A warm brass tone remained visible beneath the grey-brown surface.
The most important decision was not “How do I make it shine?” It was “Which evidence should remain, and which deterioration should be addressed?”
Cleaning and polishing are not the same intervention
Cleaning removes dirt, grease, salts, and residues. Polishing is abrasive: it removes tarnish and a small amount of the original metal. The Canadian Conservation Institute's brass-care guidance recommends deciding first whether an object should have a polished appearance and beginning with the gentlest suitable method.
For a museum object, uncertain coating, valuable patina, plating, or important surface evidence would be reasons to stop and consult a conservator. I chose a brighter—but not mirror-new—finish for this family object after inspecting its surface and accepting that the intervention would remove material.
Step 1: Making the citric-acid paste
I dissolved a few teaspoons of citric acid in hot water and mixed in a couple of tablespoons of flour until it became a spreadable paste. The flour gave the liquid enough body to remain on the curved surface and in the flower pattern.
Mr. Max, my cat and recurring workshop supervisor, arrived for quality control. I kept him away from the working area and continued with a controlled application.
Why contact time and rinsing matter
Citric acid can lift tarnish, but “mild” does not mean harmless. The Canadian Conservation Institute's guidance on brass dezincification documents that acidic products containing citric acid can produce a copper-rich pink surface when left on brass and stresses thorough rinsing after cleaning.
This article records what I did to this bowl; it is not a universal recipe. Brass composition, coatings, previous repairs, concentration, temperature, and exposure time can all change the result. A small test area, short contact, complete rinsing, drying, gloves, eye protection, and ventilation are sensible boundaries. A historically important or uncertain object belongs with a qualified conservator.
Step 2: The first cleaning pass
I spread the paste gradually over the exterior and worked it into the grooves without aggressive scrubbing. After approximately 20 minutes, I rinsed the bowl gently and completely. The difference was immediate: the treated surface showed more of the brass's warm tone, while the untouched area remained dull.
I repeated the controlled process on the inside so both faces reached a comparable starting point. After rinsing and drying, I inspected for colour changes and residue before moving to mechanical polishing.
Step 3: Polishing without chasing perfection
I began with a handheld rotary tool, soft felt tips, and a mild polishing compound. The curves and embossed details required slow, overlapping passes. My goal was to refine the surface, not flatten the pattern or erase every scratch.
As the work progressed, the felt tip collected brass-coloured dust and became firmer and more golden.
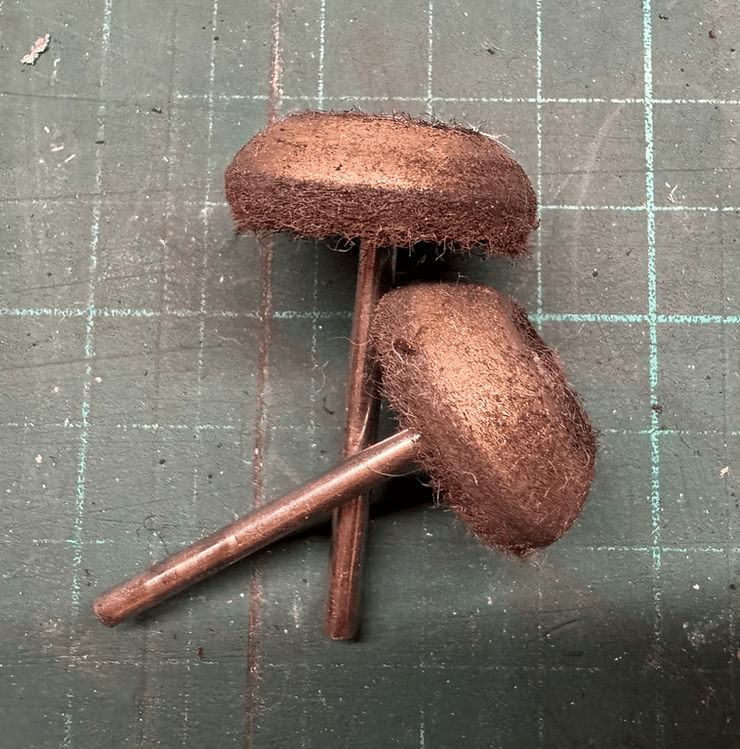
That residue was a physical reminder that polishing removes material. I checked the surface frequently, changed position, and stopped before the bowl lost the variation that made its age legible. Touch helped me feel rough and smooth areas, but visual inspection under changing light remained the better guide for the embossed detail.
Step 4: Preparing the cracks
Once the surfaces around the damaged areas were clean, I focused on the two cracks. A repair like this changes the object permanently, so alignment mattered more than making the joint visually disappear.
I used a paper clip as a simple temporary fixture to hold one damaged area in position. A thin layer of soldering flux helped the solder flow at the joint. I cut the solder into small pieces so I could place it more deliberately, then used a torch to heat the repair.
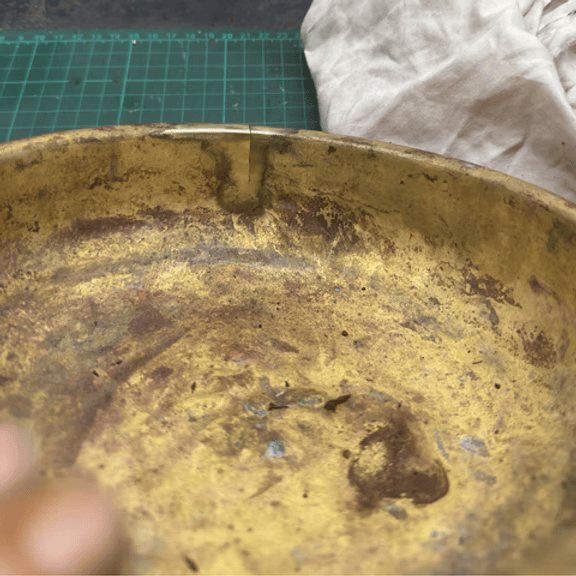
The result was not invisible or technically perfect, but the cracks held. For this project, a legible repair that stabilized the bowl for display was more truthful than pretending the damage had never happened.
Soldering safety and use limitations
Torch work, flux fumes, hot thin metal, and unknown solder composition introduce hazards that a short article cannot fully cover. The bowl was kept out of service after repair. I would not use it for food, drinking water, bathing, or planting without professional identification of the alloy and solder, evaluation of the joint, and confirmation that the complete object is suitable for that use.
Thin brass can distort or lose detail when heated. Anyone without suitable ventilation, fire control, personal protective equipment, and experience on comparable scrap material should not learn torch repair on an irreplaceable heirloom.
Step 5: Final polish and finish
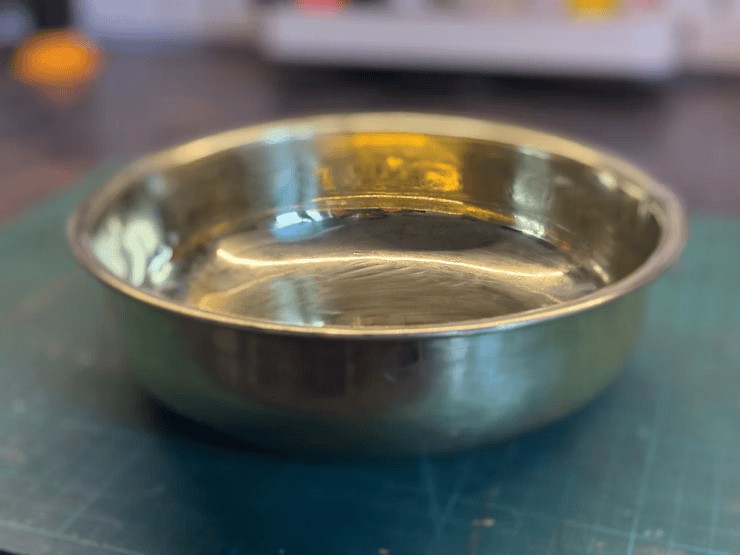
After the structural work, I returned to the surface with wool tips and a finer compound. The second polishing stage was gentler and focused on blending the overall appearance rather than maximizing reflectivity.
I worked around the embossed flower, inner lip, and repaired areas with particular care. Under soft light, the result was warm and reflective but still visibly old. That was the balance I wanted.
What worked, and what would I change?
Several decisions helped the restoration:
- Inspecting the object before choosing a finish kept the family story in the brief.
- Using a paste allowed more controlled placement than freely running liquid.
- Short, observable stages made it easier to stop before removing too much surface.
- Small solder pieces and a temporary fixture improved control at the cracks.
- Accepting a visible repair prevented cosmetic perfection from becoming the only measure of success.
If I repeated the project, I would document test areas more formally, identify the alloy and any coating before chemical cleaning, and practise the crack repair on thin scrap brass first. For a valuable, rare, or historically significant object, I would involve a metals conservator before applying acid, abrasives, heat, flux, or solder.
How should the bowl be cared for now?
The bowl should stay clean, dry, and protected from handling. Fingerprints, moisture, acidic residues, and soil can accelerate surface change. A soft dry cloth and periodic visual inspection are preferable to frequent repolishing, because every abrasive polish removes more original metal.
If new pink areas, powdery green corrosion, movement at the cracks, or trapped residue appears, the correct next step is assessment—not another aggressive cleaning cycle.
A family object renewed, not reset
When the bowl returns to my mother, it carries two connected histories: the decades she kept it and the restoration I added. It does not look factory-new, and it should not. The softened scratches, repair, embossed flower, and renewed brass tone can coexist.
You can watch the complete ASMR-style process on the Attalos YouTube channel.
For another example of preserving damage rather than erasing an object's story, read the restoration of my grandfather's burned perfect-handle screwdriver.
If you have an heirloom object and need help defining a careful restoration or display brief, tell Attalos about its condition and history.