
Blog
Designing Without Measurements
How a removable cap and a cut zip tie replaced bottle measurements in a reversible 3D-printed COB LED lamp design—without drilling or glue.
The quick answer
How can you design for an object you cannot safely measure? Use a removable reference part to define the interface, and use a physical template to capture dimensions that depend on the owner's preference.
For this bedside lamp, I did not need the fragile glass bottle. The customer brought only its original cap and cut a long zip tie to show how far the lights should extend inside the bottle. I then designed a removable 3D-printed insert around those two references. The result uses COB LED strips, concealed wiring, and a top-mounted 5.5 mm DC socket without drilling, gluing, or permanently modifying the bottle.
The design brief
From time to time, I get requests for very basic designs. Nothing complex or experimental—just something that works and fits a real need.
That kind of work is more interesting than it sounds. Ideas are rarely the limitation. The real boundaries are the requirements: What does the customer actually need? What can be ignored? How simple can the solution become without losing its purpose?
This request started with a skull-shaped clear alcohol bottle. It was heavy, decorative, and too nice to throw away. The customer wanted to turn it into a bedside lamp.
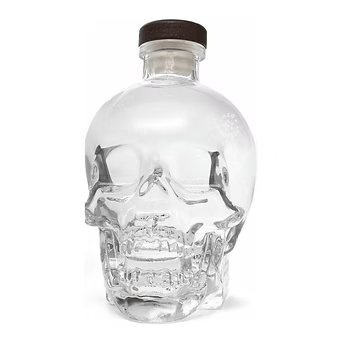 The skull-shaped glass bottle before it became a bedside lamp.
Key design facts
- Base object: a decorative skull-shaped glass bottle
- Reference part: the bottle's removable plastic cork-style cap
- Preferred light length: transferred with a cut zip tie rather than a written measurement
- Light source: COB LED strips arranged around four flat faces
- Cable path: a through-hole running along the center of the insert
- Power connection: a 5.5 mm DC socket housed at the top
- Permanent changes to the bottle: none
Why the obvious solution was too risky
Before coming to me, the customer had explored placing an E10 or E12 Edison bulb inside the bottle. Finding the right bulb was not easy, and installing one would likely require a hole for the cable. Drilling decorative glass introduces an unnecessary all-or-nothing risk: one mistake and the object is lost.
It was New Year's time, so my first suggestion was intentionally simple: put a string of Christmas lights inside and see how it feels.
That was not avoiding the design problem. It was the fastest possible prototype. Sometimes the best first test is to design nothing at all. But the customer wanted something made specifically for the bottle—clean, intentional, and still simple.
Replacing measurements with physical references
Years of design work have taught me not to ask people to measure important objects unless there is no better option. A remote measurement can be ambiguous, and a fragile or sentimental object may be inconvenient—or irresponsible—to transport.
Good design does not fight those constraints. It uses them.
Instead of asking for the bottle or a list of dimensions, I gave the customer a long zip tie and asked them to cut it to the length they wanted the LEDs to occupy inside the bottle.
No numbers. No ruler. Just preference captured as a physical reference.
Once that length was fixed, I asked them to bring only the cap. These two pieces of information answered different questions:
- The cap defined the mechanical interface with the bottle.
- The cut zip tie defined the customer's preferred illuminated length.
This is the central idea behind designing without full measurements: identify the smallest reference that controls fit, then separate it from dimensions that express a user choice.
Designing around the removable cap
The original cap was a plastic, cork-style part, which made it a practical interface. I designed around its existing form so the assembly would sit where the cap already belonged. The bottle itself did not need to be drilled, glued, or altered.
From the underside of the cap, I extended a rectangular insert to the length selected by the customer. The geometry was intentionally uncomplicated. Chamfers at the base strengthened the transition between the cap and the insert and reduced the abrupt stress concentration that a sharp internal corner would create.
The simple rectangular form also created four useful flat faces.
Building the light and cable architecture
Four faces for COB LED strips
The four faces allowed the COB LED strips to be distributed evenly around the insert. Grooves along the extrusion located the strips, kept them aligned, and made the lighting assembly feel like part of the design rather than something wrapped around it afterward.
A concealed central cable path
A through-hole runs down the center of the insert. At the top, a larger opening houses the 5.5 mm DC power socket. The LED wiring passes through the center and exits at the socket instead of hanging visibly beside the light source.
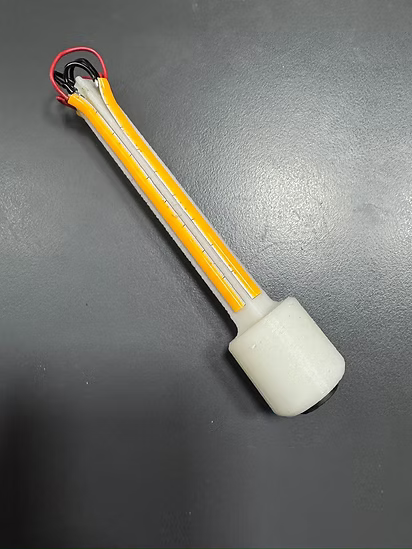 The 3D-printed insert with integrated COB LED strips and a top-mounted DC power socket.
Cable routing is easy to treat as a secondary detail, but visible wiring can make an otherwise resolved object feel unfinished. Here, the cable path was part of the architecture from the start.
The reversible result
The completed insert drops into the bottle from above and sits at the existing cap interface. It turns the bottle into a bedside lamp without drilling, glue, or another irreversible change. The original glass remains untouched, and the lighting assembly can be removed as one piece.
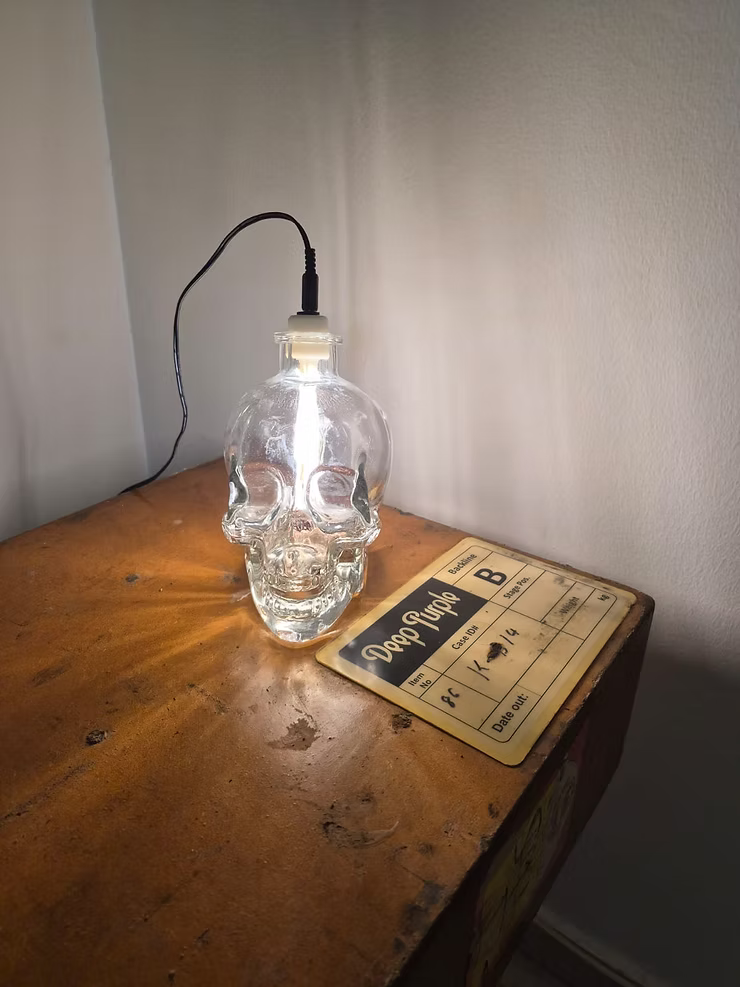 The finished bedside lamp in use, photographed by the customer.
What this project teaches about constraint-led design
This small lamp suggests a reusable process for other one-off design problems:
- Protect the original object. Avoid irreversible work when a removable interface can do the job.
- Find the controlling feature. The cap—not the entire bottle—controlled the fit.
- Separate fit from preference. The cap supplied geometry; the zip tie supplied the desired light length.
- Prototype before engineering. A loose string of lights could test the visual idea before committing to a custom part.
- Design cable routing early. Power and wiring belong in the first concept, not at the end.
- Keep geometry purposeful. The rectangular insert provided strength, four LED faces, and space for a central cable path.
Limits of the method
“Without measurements” does not mean “without accuracy.” The cap still had to be modelled closely enough to fit, and the insert length still needed a physical reference. It means avoiding unnecessary measurements of the full object and collecting only the information that actually controls the design.
The exact insert is not universal: bottle caps, necks, LED strips, sockets, and power requirements can differ. A similar project should be designed around its own removable interface and matched electrical components rather than copied from appearance alone.
Final thought
Sometimes the best design is not about adding more features. It is about reducing friction, lowering risk, and respecting both the object and the person who owns it.
That is the kind of simplicity I enjoy designing: a practical part that quietly does its job and leaves the original object intact.
Have a similar object or constraint-led design problem? Tell us about it.